Vue Tutorial Part II: Build a Frontend Quiz App
This is a followup post on Vue Tutorial: Build a Frontend Quiz App. We are building a Vue Frontend Quiz App from scratch or using the Starter Code. The second part extends this Quiz App with a modal shown when the user finishes the quiz displaying his score. 🔥
Check out a live preview of the Quiz App

In this Vue Tutorial Part II we are building a Modal to give the user feedback on his score and options to keep playing or reach out on Twitter! 🚀

In case you're not cloning my Starter Code from GitHub, you can get the Twitter Logo here
Steps for this Vue Tutorial:
- Build a custom Modal component
- Use a watcher to emit a custom event on quiz end
- Catch event in App component, pass user score to Modal and handle functionality
When finished, we want our App.vue component structure to have Quiv.vue and Modal.vue side-by-side as siblings interchanging data via custom events passed through their parent App component.
<div id="app">
  <Quiz @quiz-completed="handleQuizCompleted" :key="quizKey" />
  <Modal
    v-show="showModal"
    header="Congratulations!"
    subheader="You've completed your Quiz!"
    v-bind:quizScore="quizScore"
    @reload="updateQuiz"
    @close="showModal = false"
  />
</div>
Step 1: Build a custom Modal component
First, we'll setup the empty Modal with blurred background centered vertically and horizontally.
// Modal.vue
<template>
  <transition name="modal">
    <div class="modal-mask">
      <div class="modal-wrapper">
        <div class="modal-container">
          <div class="modal-header">
            <h2>{{ header }}</h2>
            <h3>{{ subheader }}</h3>
          </div>

          <div class="modal-body"></div>

          <div class="modal-footer"></div>
        </div>
      </div>
    </div>
  </transition>
</template>

<script>
export default {
  name: "Modal",
  props: {
    header: String,
    subheader: String,
    quizScore: Object,
  },
};
</script>

<style scoped>
.modal-mask {
  position: fixed;
  z-index: 9998;
  top: 0;
  left: 0;
  width: 100%;
  height: 100%;
  background-color: rgba(0, 0, 0, 0.5);
  display: table;
  transition: opacity 0.3s ease;
}

.modal-wrapper {
  display: table-cell;
  vertical-align: middle;
}

.modal-container {
  width: 90vw;
  max-width: 650px;
  margin: 0px auto;
  padding: 20px 30px;
  background-color: #fff;
  border-radius: 6px;
  box-shadow: 0 2px 8px rgba(0, 0, 0, 0.33);
  transition: all 0.3s ease;
}

.modal-header {
  text-align: center;
}

.modal-header h2 {
  color: rgb(0, 178, 72);
}

.modal-header h3 {
  color: rgb(0, 178, 72);
}

.modal-body {
  display: flex;
  flex-direction: column;
  margin: 20px 0;
  line-height: 3rem;
}

.modal-body > * {
  margin: 1rem 0;
  padding: 0.25rem 0.5rem;
}

.modal-footer {
  display: flex;
  justify-content: space-between;
}

/*
 * The following styles are auto-applied to elements with
 * transition="modal" when their visibility is toggled
 * by Vue.js.
 *
 * You can easily play with the modal transition by editing
 * these styles.
 */

.modal-enter {
  opacity: 0;
}

.modal-leave-active {
  opacity: 0;
}

.modal-enter .modal-container,
.modal-leave-active .modal-container {
  -webkit-transform: scale(1.1);
  transform: scale(1.1);
}
</style>
The raw Modal component is based on this official Vue example Modal Component
Basically, the raw Modal component consists of three outside elements: modal-mask > modal-wrapper > modal-container.
CSS styles accomplish several things here:
.modal-maskspans the full width and height of the screen on top of everything else providing the gray blurred ground around the modal..modal-wrapperis a table cell centered in the middle of.modal-mask.modal-containersets the space for the modal's content
The content consists of modal-header, modal-body and modal-footer as siblings.
We're putting two props header and subheader to the Modal component to make is reusable. The third prop we need is the user's score i.e. quizScore which we will receive from the Quiz component's custom event.
A quick revision of custom events in Vue is here
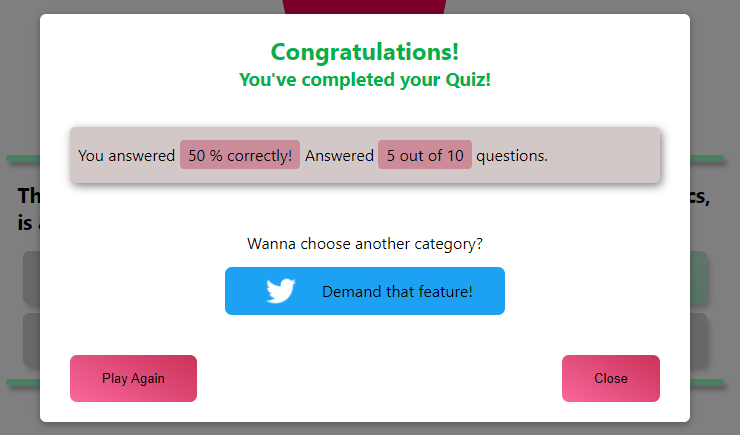
Here is the additional content for the Modal component: Replace the empty div.modal-body with this.
// Modal.vue
<div class="modal-body">
  <div id="score">
    You answered
    <span class="highlight">
      {{
        Math.floor(
          (quizScore.correctlyAnsweredQuestions /
            quizScore.allQuestions) *
            100
        )
      }}
      % correctly!
    </span>
    Answered
    <span class="highlight">
      {{ quizScore.correctlyAnsweredQuestions }} out of
      {{ quizScore.allQuestions }}
    </span>
    questions.
  </div>
  <div id="chooseCategory">
    Wanna choose another category?

    <a
      href="https://twitter.com/messages/compose?recipient_id=1315961855148523521&text=Hello%20Christian%20I%20would%20like%20to%20choose%20other%20categories%20with%20headsUP"
      class="twitter-dm-button"
      data-screen-name="@CKozalla"
    >
      <img
        src="@/assets/Twitter_Logo_WhiteOnBlue.png"
        alt="Twitter Logo"
        class="twitter-logo"
      />Demand that feature!
    </a>
  </div>
</div>
In the modal-body we are doing two things:
- Display the user's score. The
quizScoreprop contains how many questions the user answered correctly and the total number of questions. - Ask user if he likes to choose another category. Since I designed this Vue Quiz App as an example for beginners to Vue.js with basic knowledge of web development, I assume that mostly web developers who want to extend their skills will play this quiz. So, I included a Call to Action if somebody wanted to reach out to me via Twitter 😄
Replace the empty div.modal-footer with the next snippet:
<div class="modal-footer">
  <button
    id="play-again"
    class="button-footer"
    @click="$emit('reload')"
  >
    Play Again
  </button>
  <button
    id="close-button"
    class="button-footer"
    @click="$emit('close')"
  >
    Close
  </button>
</div>
Two buttons are included in the modal-footer which will emit custom events on click. Here, you can see the inline use of $emit('event-name') without this.
Both our events reload and close are bubbling up to the parent component App.vue, will be caught and handled there. We'll find out about handling reload and close, later 😉
Add the corresponding CSS to the Modal component.
.button-footer {
  padding: 1rem 2rem;
  background: linear-gradient(
    210deg,
    rgba(187, 0, 47, 0.8),
    rgba(245, 0, 87, 0.6)
  );
  border-radius: 7px;
  border: none;
}

.anchor-footer {
  color: black;
  text-decoration: none;
  cursor: default;
}

.button-footer:active,
.button-footer:focus {
  outline: none;
}

.button-footer:hover {
  transform: scale(1.02);
}

.highlight {
  border-radius: 4px;
  background-color: rgba(187, 0, 47, 0.3);
  padding: 0.25rem 0.5rem;
}

.twitter-dm-button {
  display: flex;
  justify-content: space-between;
  width: 280px;
  background-color: #1da1f2;
  padding: 0 2rem;
  border-radius: 7px;
  text-decoration: none;
  color: black;
  margin: 0 auto;
}

.twitter-logo {
  width: 48px;
  height: 48px;
}

#score {
  background-color: rgb(210, 200, 200);
  border-radius: 5px;
  box-shadow: 2px 3px 9px gray;
}

#chooseCategory {
  text-align: center;
}
Step 2: Use a watcher to emit a custom event on quiz end
All the game logic takes place in our Quiz component.
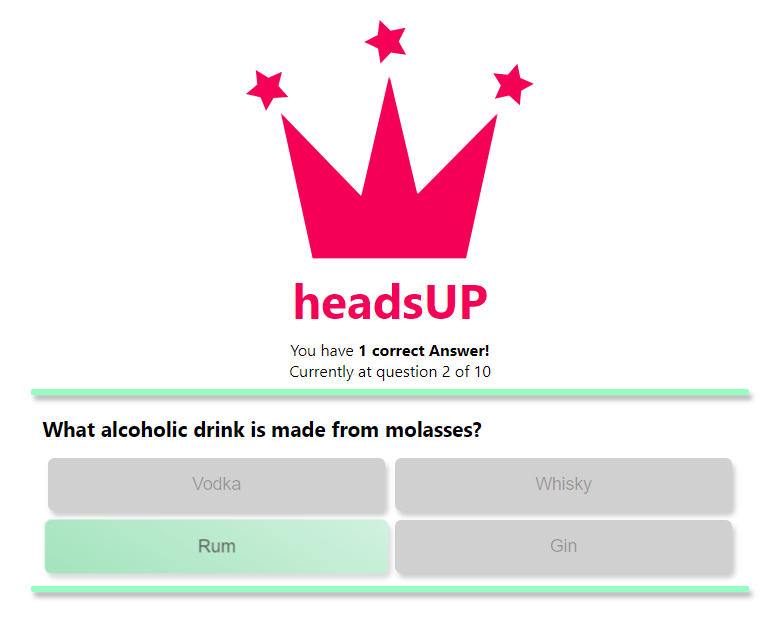
First, we want to show the user which question they are viewing, how many questions overall and how many questions they answered correctly. We will include the follow snippet to Quiz.vue template.
// Quiz.vue
<h1 id="logo-headline">headsUP</h1>
<div class="correctAnswers">
  You have
  <strong>{{ correctAnswers }} correct {{ pluralizeAnswer }}!</strong>
</div>
<div class="correctAnswers">
  Currently at question {{ index + 1 }} of {{ questions.length }}
</div>
In order to show the user's score, we need to collect the data first.
// Quiz.vue
// Add these to computed properties
score() {
  if (this.questions !== []) {
    // Here, we want to collect data in an object about the users statistics - later be emitted on an event when users finishes quiz
    return {
      allQuestions: this.questions.length,
      answeredQuestions: this.questions.reduce((count, currentQuestion) => {
        if (currentQuestion.userAnswer) {
          // userAnswer is set when user has answered a question, no matter if right or wrong
          count++;
        }
        return count;
      }, 0),
      correctlyAnsweredQuestions: this.questions.reduce(
        (count, currentQuestion) => {
          if (currentQuestion.rightAnswer) {
            // rightAnswer is true, if user answered correctly
            count++;
          }
          return count;
        },
        0
      ),
    };
  } else {
    return {
      allQuestions: 0,
      answeredQuestions: 0,
      correctlyAnsweredQuestions: 0,
    };
  }
},
correctAnswers() {
  if (this.questions && this.questions.length > 0) {
    let streakCounter = 0;
    this.questions.forEach(function(question) {
      if (!question.rightAnswer) {
        return;
      } else if (question.rightAnswer === true) {
        streakCounter++;
      }
    });
    return streakCounter;
  } else {
    return "--";
  }
},
pluralizeAnswer() {
  // For grammatical correctness
  return this.correctAnswers === 1 ? "Answer" : "Answers";
},
quizCompleted() {
  if (this.questions.length === 0) {
    return false;
  }
  /* Check if all questions have been answered */
  let questionsAnswered = 0;
  this.questions.forEach(function(question) {
    question.rightAnswer !== null ? questionsAnswered++ : null;
  });
  return questionsAnswered === this.questions.length;
},
score()uses the reducer array prototype to reduce the current questions array to a number a) to count the correct answers and b) to track the total number of currently answered questions. It returns thequizScoreobject we use in the Modal componentcorrectAnswers()counts the correct user answers based on the questions arraypluralizeAnswer()returns "Answer" iscorrectAnswers()is currently equal to 1 to provide a grammatically correct sentence in the template - i.e. "You have 1 correct Answer" (not Answers...)quizCompleted()returns a boolean whether the quiz is completed.
Next, we need to fire a function the moment quizCompleted() === true to emit a custom event to pass the quizScore returned by this.score to the App component
We write a watcher on quizCompleted() which will do exactly what we want.
// Quiz.vue
watch: {
  quizCompleted(completed) {
    /*
      * Watcher on quizCompleted fires event "quiz-completed"
      * up to parent App.vue component when completed parameter
      * returned by quizCompleted computed property true
      */
    completed &&
      setTimeout(() => {
        this.$emit("quiz-completed", this.score);
      }, 3000); // wait 3 seconds until button animation is over
  },
},
Step 3: Catch events in App component, pass user score to Modal, restart Quiz
We are adding the Modal to the App component in the template.
// App.vue
<Modal
  v-show="showModal"
  header="Congratulations!"
  subheader="You've completed your Quiz!"
  v-bind:quizScore="quizScore"
  @reload="updateQuiz"
  @close="showModal = false"
/>
We are using v-show="showModal" to conditionally render the modal based on this.showModal. Passing two static props header and subheader and one dynamic prop quizScore from data() to the modal. Catching two custom events reload and close emitted from the modal-footer buttons.
Additionally, we're adding state and methods to the App component. Here is the whole updated script.
// App.vue
<script>
import Quiz from "@/components/Quiz.vue";
import Modal from "@/components/Modal.vue";

export default {
  name: "App",
  components: {
    Quiz,
    Modal,
  },
  data() {
    return {
      quizKey: 0,
      showModal: false,
      quizScore: {
        allQuestions: 0,
        answeredQuestions: 0,
        correctlyAnsweredQuestions: 0,
      },
    };
  },
  methods: {
    handleQuizCompleted(score) {
      this.quizScore = score;
      this.showModal = true;
    },
    updateQuiz() {
      this.showModal = false;
      this.quizKey++;
    },
  },
};
</script>
Let's go over the methods we're using here to handle the events involved.
handleQuizCompleted(score)receives the users score from the Quiz component and sets it to local state onthis.quizScore.handleQuizScore()is triggered by our custom eventquiz-completeddefined in the watcher before.
We need to catch that event on the Quiz component!
// App.vue
<Quiz @quiz-completed="handleQuizCompleted" :key="quizKey" />
The first part @quiz-completed="handleQuizCompleted" is clear, but what is the second part :key="quizKey"?
Glad you asked! 😄
We are binding the key of the Vue component to a data property quizKey.
But why?
The quizKey is increased by one in updateQuiz() which is triggered by the reload event from the Modal.
If the user wants to play another round, the Quiz component needs to re-render! It will then fetch another set of questions from the API and guide the user through the quiz.
How to trigger a component to re-render in Vue.js?
There are several ways to trigger a component to re-render in Vue, but the most elegant for this purpose is the Key Changing Technique
Basically, you can bind a unique key to a Vue component, not only to <li> items like you might be used to in React or Vue. If that unique key is changed, the whole old component is trashed and a new component with the new key renders instead.
To start a new round of the quiz we are exploiting that behavior here.
Wrap it up
In conclusion, to extend the existing quiz from Vue Tutorial Part I with a Modal component we learned a few things:
- Use a watcher on a computed property
- Emit custom events to pass data between components
- Catch such events and handle the data
- Trigger a re-render of a Vue component
